(Author’s note: times sure have changed! 2018 was a different time. At this point you should really be doing some kind of federation/SSO!)
Earlier this year I had the opportunity to present a short talk at the AWS Toronto Summit in 2018. While the recording is now available for viewing, I’ve had several requests for a blag version, which is precisely what this post is all about.
The talk, “Practical IAM Policies for AWS Admins” covers a few IAM best practices that are surprisingly easy to implement and which provide outsized improvements on account security:
- Enforcing MFA on IAM user accounts
- Providing pseudo sudo access for IAM users
- Making the policies stick
The last one is a bit meta. The policies below have a couple of subtle gotchas for CLI users, so if you want the policies to stick, you’ll have to make them easy to use. Anyway, let’s get into it.
Enforcing MFA on IAM Accounts Link to heading
Arguably the best way to enforce MFA on all AWS console access isn’t to create IAM users at all but rather to use some sort of federated login. If the identity provider can enforce MFA on all logins then all you need to do is link it up. If that’s not an option or IAM user accounts are preferred, then you’ve probably noticed something missing from the IAM password policy section:
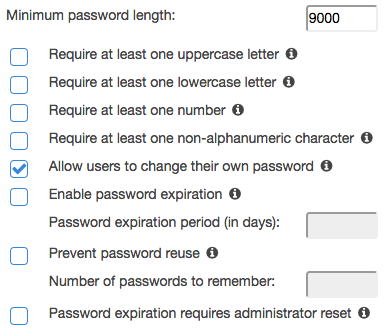
There’s no checkbox for requiring MFA for IAM users.
Somewhat relatedly: have you ever been granted read-only access to an AWS account, only to discover that you couldn’t change your password, or enable MFA? That’s because those actions require the user to have access to iam:ChangePassword and iam:EnableMFADevice, both of which are considered write actions by IAM. You could attach a policy to that user that grants them these actions against their own ARN (inconvenient at scale) or against * (bad), but Amazon already has you covered with a better approach:
Tutorial: Enable Your Users to Configure Their Own Credentials and MFA Settings
Wow is this document is a treasure, because it offers a lot more than just what’s in the title. Sure it delivers on the initial promise, but scroll down a bit further and you’ll find a statement ID reading BlockMostAccessUnlessSignedInWithMFA that looks very different than most IAM policies you may have encountered before. It looks like this:
{
    "Sid": "BlockMostAccessUnlessSignedInWithMFA",
    "Effect": "Deny",
    "NotAction": [
        ...
        ...
    ],
    "Resource": "*",
    "Condition": {
        "BoolIfExists": {
            "aws:MultiFactorAuthPresent": "false"
        }
    }
}
The AWS permissions model is default-deny, which means that most IAM policies grant access using "Effect": "Allow" against a list of "Actions": [ ... ... ]. The above policy does the opposite, and is a triple-negative to boot:
- It’s a
Denypolicy, meaning it supercedes anyAllowpolicy against the same action + resource - It uses
NotActionwhich means it applies to all actions except those listed - It has a
Conditionthat the policy will only be activated if MFA is not present
In other words: no matter what other permissions a user has been granted, this policy will flip all of their access to Deny with the exception of the a handful of actions specified by the policy (which are incidentally those required to enable and use MFA). Even if that user has policies attached which would otherwise grant them full admin access to the account, everything will be switched off until they enable MFA, log out, and log in again.
As you can probably guess by the log out/log in step, there’s a bit more going on here, but I’ll get to that in a bit.
Pseudo Sudo Link to heading
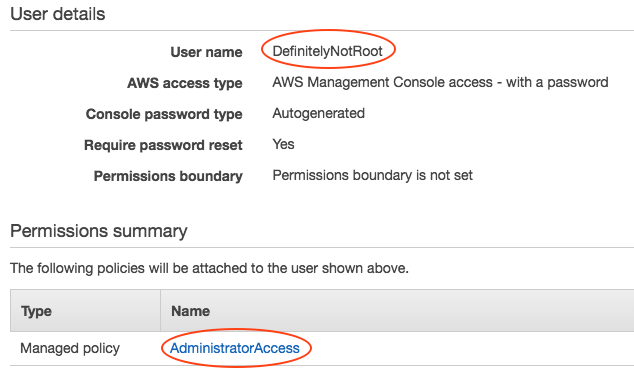
One of the first things that AWS encourages you to do when setting up a new account is to create non-root IAM users, and to stop using the root account except for emergencies or extraordinary circumstances. When you did this for the first time, what kind of privileges did you assign to your team? Probably AdministratorAccess. Now instead of having one all-powerful root account, you have several! Sure those other accounts aren’t called root, but an account by any other name that has AdministratorAccess may as well be root.
The all-powerful not-root-but-kind-of-root access is understandable at first. Even if you have plans to build all of your resources with CloudFormation or Terraform, you still need an admin account to set those things up first! Even once it’s set up, you may have to firefight in situations where you can’t wait for Jenkins to chew on your infrastructure-as-code PR as it churns through an incredibly thorough (and equally time-consuming) CI/CD pipeline.
These are valid reasons to want an admin account even after you’ve automated the heck out of everything, but having an account fully powered-up all the time can lead to some pretty bad accidents – especially if your CLI keys point to prod. Really, whom among us hasn’t run terraform destroy against the wrong environment?
Just as *nix admins with root access don’t actually log into their machines as root, neither should you log into your AWS account as root or root-equivalent. It’s better to log in with (at most) read-only or otherwise limited access, and to break the glass and elevate to a super user only when necessary. IAM machinery can do this with something called roles. If you’re not familiar with IAM roles, they’re sort of policy containers that can be assumed by other AWS resources such as Lambdas. You can usually spot a role whenever one AWS resource needs to access or mutate another.
To make our pseudo sudo workflow, we’re first going to create a new role:
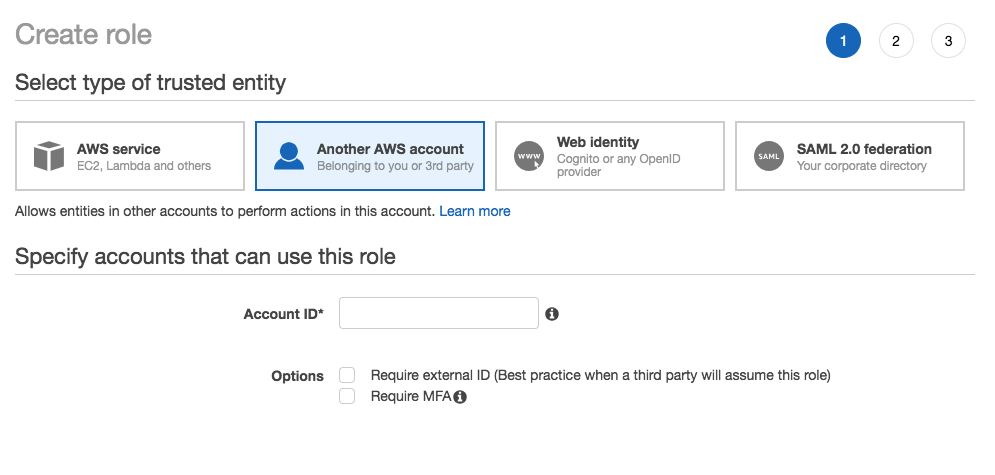
We’re being asked for the account ID of “another” AWS account according to the UI, but just put your own account ID here; this role is to be assumed by IAM users in your own account. By the way – notice the “Require MFA” checkbox? We found it! I’ll talk about this a bit more at the end. Leave “Require external ID” unchecked.
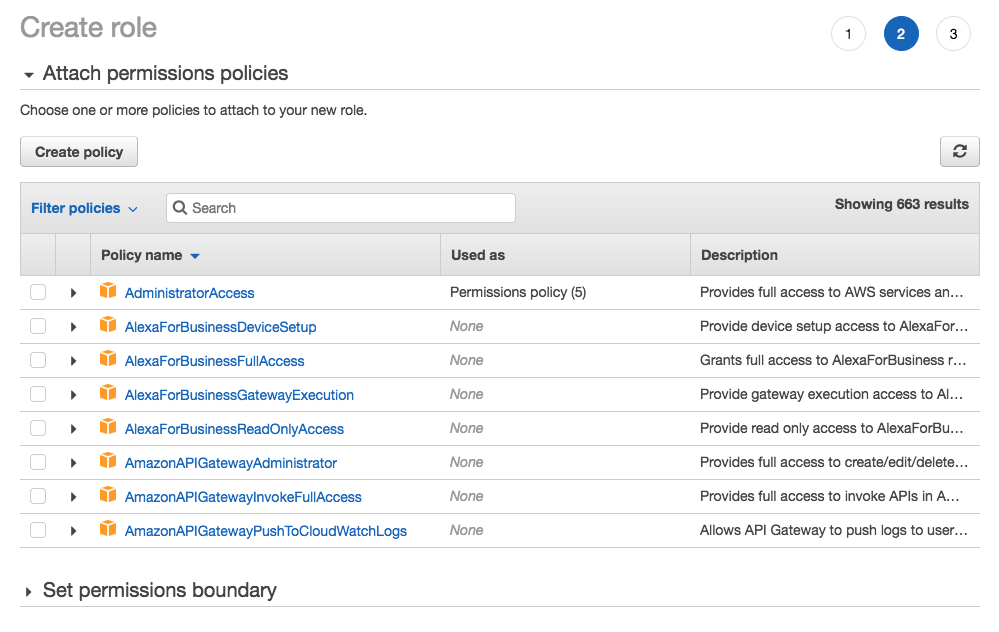
Next, assign some policies to the role. Will this be a full-blown admin role with blanket access to the entire account when things are on fire? Assign AdministratorAccess. If it’s a role just for a database team to manage RDS instances, then assign only the necessary RDS-related policies to the role.
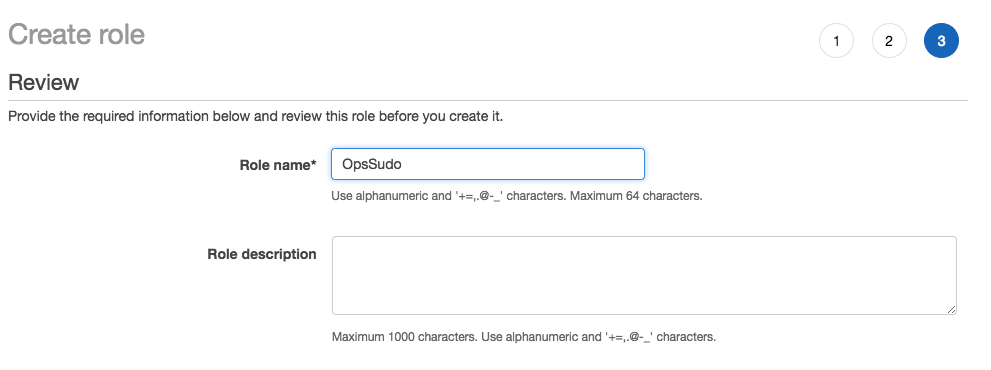
Give the role a name – nothing too clever. OpsSudo is probably good enough if it will be a role that the ops team uses to become superadmin.
Once you’re done, you’ll have a role ARN and a role switching link:
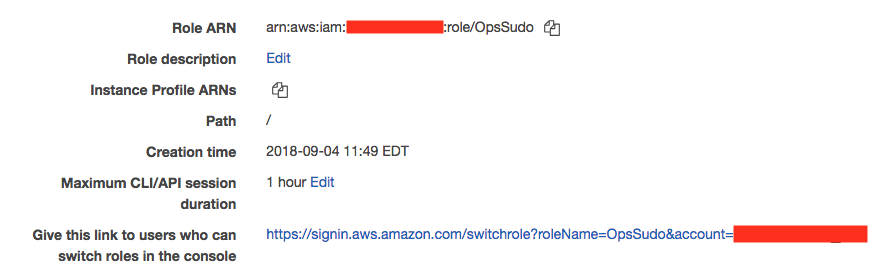
Use the ARN to create a new IAM policy like this:
{
  "Version": "2012-10-17",
  "Statement": [
    {
      "Effect": "Allow",
      "Action": [
        "sts:AssumeRole"
      ],
      "Resource": [
        "arn:aws:iam::123456789012:role/OpsSudo"
      ]
    }
  ]
}
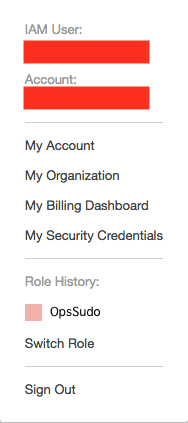
Assign that policy to your ops team, plus any read-only policies you think they’ll need. They’ll log in with whatever read-only access has been granted, plus the ability to switch to the OpsSudo role which has all that emergency access. The easiest way to perform that switch is by using the role-switching link, which will put a button in the AWS account menu that makes it easy to switch back and forth between different roles.
Now even if you have access/secret keys pointed at production, the worst you can do is dump out all of the account information (which, let’s be honest, isn’t great), but you won’t be able to accidentally standup bitcoin miners or destroy the main production database anymore. Sure you can still use the access/secret keys to assume the sudo role and then destroy production, but you’ll have to really mean it.
Making it Stick Link to heading
Not so fast though: if you just implement the above two best practices, you might be unexpectedly breaking someone’s CLI workflows. I hinted earlier that the condition aws:MultiFactorAuthPresent isn’t about MFA being enabled; it’s about it being present. What’s the difference? “Enabled” means just that; MFA is enabled. “Present” means that you have an authenticated session which was created using an MFA token. That’s why for the web console you have to log out and log back in again after enabling MFA for the first time; it became enabled, but it wasn’t “Present” until you logged in again with your MFA token. Requiring it to be “present” means that you can’t just fire off API calls anymore without first creating a new MFA-signed session, and since the CLI just makes API calls you can probably see a problem.
Let’s say you have blanket read-only access, the ability to assume the OpsSudo role, and the policy that requires MFA to be present. You won’t be able to list S3 buckets:
$ aws s3 ls

An error occurred (AccessDenied) when calling the ListBuckets operation: Access Denied
No MFA-signed session means that the Deny policy overrides whatever else you think you have access to. You can solve this by creating an ephemeral session with a TOTP code:
$ aws sts get-session-token
  --serial-number arn:aws:iam::123456789012:mfa/some-username
  --token-code 123456

{
    "Credentials": {
        "SecretAccessKey": "...",
        "SessionToken": "...",
        "Expiration": "...",
        "AccessKeyId": "..."
    }
}
Then just copy the output and re-export them as environment variables and… well. Hm. Who has time for that? While the AWS CLI does support prompting for MFA, it will only prompt when you’re assuming another role. I suppose you could write some python to solve this problem, but surely someone else already has?
(They sure did.)
aws-vault Link to heading
There’s a project by 99designs called aws-vault which is objectively amazing. It does some pretty neato things:
- It knows about and uses your
~/.aws/config - It knows how to create ephemeral sessions with your MFA token, and how to assume roles
- It stores your access/secret keys in an encrypted backend (like Keychain if you’re using macOS)
- This means you can (and should) delete
~/.aws/credentials
- This means you can (and should) delete
Here’s an example configuration of an ~/.aws/config file setup to work with aws-vault:
$ cat ~/.aws/config

[profile read-only]
region = us-east-1
mfa_serial = arn:aws:iam::123456789012:mfa/some-user

[profile opssudo]
source_profile = read-only
role_arn = arn:aws:iam::123456789012:role/OpsSudo
mfa_serial = arn:aws:iam::123456789012:mfa/some-user
That config is compatible with the vanilla AWS CLI; aws-vault just happens to know how to parse it. The biggest configuration difference with aws-vault is where it stores the secrets: delete ~/.aws/credentials and stop storing your production dev keys on your laptop in plaintext. Then put them into aws-vault:
$ aws-vault add read-only
Enter Access Key ID: AK...
Enter Secret Key: abcd1234...
And that’s pretty much it. Now you can use aws-vault to consume your config + credentials and list those buckets:
$ aws-vault exec read-only -- aws s3 ls

Enter token for arn:aws:iam::123456789012:mfa/some-user: 123456

my_bucket
my_bucket_v2
my_bucket_v2_final
...
Aws-vault keeps track of your ephemeral sessions, so you won’t be prompted for MFA a second time if you run more commands before the session expires. You will be prompted to enter the macOS Keychain password, which is actually kind of nice because it means someone can’t just walk up to your laptop and steal your credentials.
Role assumption with aws-vault is also easy:
$ aws-vault exec opssudo -- aws s3 sync . s3://my_bucket
...
...
There’s some internal acrobatics that happen behind the scenes:
- aws-vault knows it needs to use the
read-onlyprofile to assume theopssudoprofile - aws-vault knows it needs to create an MFA-powered session in order for the
read-onlyprofile to do anything - aws-vault checks to see if there’s already an existing session for
read-only
- If so, aws-vault uses that existing session to assume the
OpsSudorole - If not, aws-vault prompts for the MFA token, uses that to create an ephemeral MFA-powered session, and then uses that session to start another session with the
OpsSudorole
After doing all that, it forks and execs aws s3 sync, which retrieves the credentials from environment variables. You can even see those environment variables by calling env instead of the CLI:
$ aws-vault exec opssudo -- env | grep AWS_
AWS_ACCESS_KEY_ID=...
AWS_SECRET_ACCESS_KEY=...
AWS_SESSION_TOKEN=...
AWS_SECURITY_TOKEN=...
These environment variables are only available to the forked process. They don’t persist, so you won’t see them if you run env again without aws-vault:
$ env | grep AWS_
$
This means you can use aws-vault for more than just the CLI. You can execute a boto3-powered python script or even fire up a rails app. As long as the thing you’re invoking knows how to consume AWS credentials from environment variables (which all of the official AWS SDKs should do) you can use it with aws-vault.
Recap Link to heading
So that’s how to require MFA on IAM user accounts (to protect yourself from people with bad intentions), using pseudo sudo access (to protect yourself from people with good intentions but accidental input), and how you can use aws-vault to solve a bunch of workflow problems that might arise from doing those two things. Even if you don’t implement the first two best practices, aws-vault is kind of amazing on its own for removing plaintext secrets from your laptop.
What about… Link to heading
If you’re new to AWS, or only manage a single account, then hopefully you’ll find the above practices useful. If you have a more complex setup comprised of several AWS accounts and you happen to be an IAM wizard, then you may be wondering if a bastion account is a better approach, and the answer is: maybe. The world of software is one of trade-offs and bastion AWS accounts make the most sense when you have a lot of AWS accounts to manage, whereas the above practices apply best to organizations with one account or otherwise very few unlinked accounts.
The concept of a bastion AWS account is out of scope for this post (not to mention some recent multi-account SSO stuff that’s come out) but conceptually it works a bit like this:
- You have multiple AWS accounts with real business resources in them (dev, staging, production, QA, internal, etc etc)
- You don’t want to create and manage users across all of them
- You create a special “bastion” AWS account which has no business resources in it at all except for IAM users
- Those IAM users cannot perform any actions, except to assume roles in the other AWS accounts
That’s why there’s a checkbox in the role creation workflow that allows you to require MFA for role assumption. This could suggest (strong maybe here) that Amazon’s philosophy is that any “real” access should be bounded by IAM roles, and anything important enough to require MFA should also require role assumption. That’s also likely why the AWS CLI supports prompting for MFA only in the context of assuming another role. For everyone else, there’s BlockMostAccessUnlessSignedInWithMFA.